
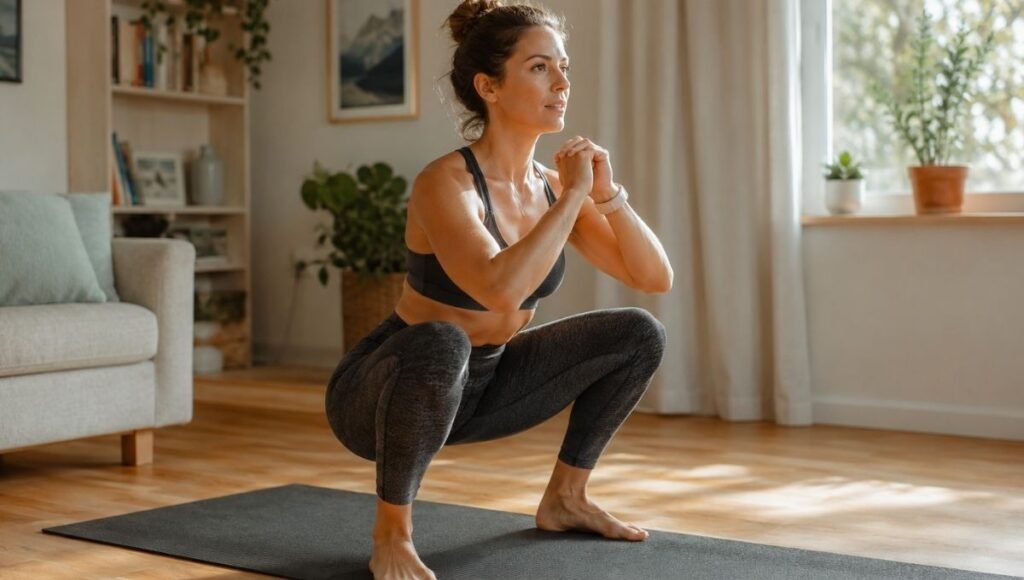
The squat is the most fundamental movement in human fitness. Not because fitness people decided it was important — because your body already does it every single day. Sitting down. Getting up from a chair. Picking something up off the floor. Lowering yourself onto the toilet. All of these are squats. You already know how to squat. You’ve been doing it your entire life.
What most beginners actually need isn’t instructions on how to squat — it’s instructions on how to squat well under load, and progressively increase the challenge over time. That’s the part nobody explains clearly.
This guide covers everything: what a proper squat looks like, the five mistakes that cause the most beginner problems, how to tell if your form has actually improved, a progression from zero experience to weighted squats, and a 4-week squat workout plan you can do entirely at home. No gym needed. A chair is helpful for the first week. A pair of dumbbells or a resistance band becomes useful by week 3.
Key Takeaways
- The squat primarily works your quadriceps, glutes, and hamstrings — the largest muscle groups in your body, which is why squatting consistently produces the most significant body composition changes of any single exercise
- Research published in the Journal of Strength and Conditioning Research confirms that squats activate more total muscle mass per repetition than almost any other lower body exercise, making them the most metabolically efficient leg movement
- The most common beginner squat problem isn’t weakness — it’s limited ankle mobility causing heels to rise or knees to cave inward; this is addressable with simple mobility work
- Beginners should master bodyweight squats at full depth before adding any resistance — adding weight to poor form makes the form problem worse, not better
- The 3-second lowering phase (slow eccentric) produces significantly more muscle stimulus than a fast squat — slow squats are genuinely harder and more effective than fast squats at the same weight
- A complete squat workout program produces visible lower body changes within 6–8 weeks of consistent training 3 times per week
What Muscles Do Squats Work?
Before the technique, understand what you’re actually training — because it changes how you focus your attention during the movement.
Quadriceps (front of thigh): The primary muscle doing the work as you stand back up from the squat. The lower you squat, the more quad range of motion is involved.
Glutes (your entire rear): Maximally loaded at the bottom of the squat and during the drive back up. Deeper squats produce greater glute activation. If you’re squatting for the glute development specifically, depth matters.
Hamstrings (back of thigh): Work as stabilizers throughout the squat and become more primary movers in deeper squat variations.
Core and lower back: Work continuously throughout the squat to maintain an upright torso. A squat done correctly is also a core stability exercise.
Calves and ankle stabilizers: Work to maintain heel contact with the floor and stabilize the ankle joint under load.
Understanding this helps when something feels “off” — if you feel your squat predominantly in your lower back rather than your legs and glutes, your form has broken down and your back is compensating.
Sportzillax editor note: If someone tells you squats are bad for your knees, that’s outdated advice. Research consistently shows that properly performed squats strengthen the knee joint by developing the muscles that support it. The key words are “properly performed.” Poor form can stress the knee; good form strengthens it.
How to Do Squats Correctly: Proper Form Step by Step
Your Starting Position
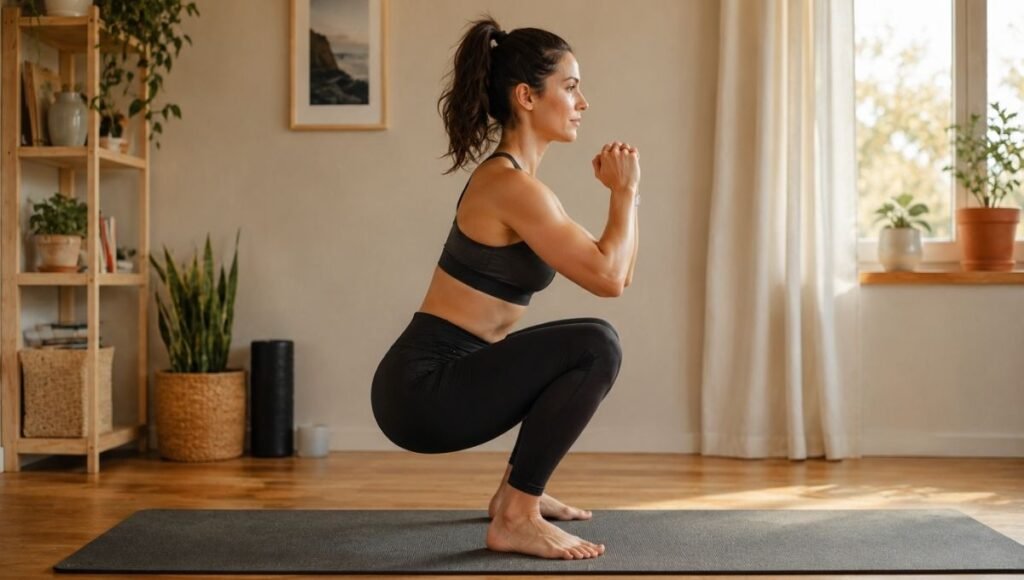
Stand with feet approximately shoulder-width apart. Your feet can point straight forward or slightly outward — somewhere between 0 and 30 degrees. There’s no single “correct” foot angle; the right angle is the one that allows you to track your knee directly over your second or third toe throughout the movement. Experiment with a few sessions before settling on your angle.
Weight should be distributed across your whole foot — not just the toes, not just the heels. Press all four corners of your foot into the floor: the ball of the big toe, the ball of the little toe, the inner heel, the outer heel.
The Descent
Take a breath in and brace your core (imagine someone is about to lightly punch your stomach — create pressure, don’t suck in). This bracing protects your spine throughout the movement.
Push your knees outward slightly as you begin to descend — not excessively, just enough to keep them tracking over your toes rather than caving inward. Your hips are moving backward and downward simultaneously. Think “sit back and down” rather than “sit straight down.”
Lower until your thighs are approximately parallel to the floor — or as close as your mobility allows without your heels rising off the floor. At the bottom, your chest should be relatively upright. If your chest collapses toward your knees, your hip flexors or hamstrings are limiting your depth.
The Ascent
Drive through your entire foot (not just your toes), push the floor away from you, and squeeze your glutes as you return to standing. Your hips and chest should rise at the same rate — if your hips rise faster than your chest, your lower back is rounding.
At the top, fully extend your hips. Don’t finish the squat with a slight bend in the hips or knees — stand fully upright and actively squeeze your glutes at lockout.
Breathing
Breathe in on the way down. Breathe out on the way up. For heavier squats, some people prefer to hold their breath throughout a single rep (Valsalva maneuver) for spinal stability — but for bodyweight and light resistance, inhale down, exhale up works well.
The 5 Most Common Squat Mistakes (And Exactly How to Fix Them)
Mistake 1: Heels Rising Off the Floor
What it looks like: As you descend, your heels lift, you end up on your toes, and your balance shifts forward.
Why it happens: Limited ankle dorsiflexion mobility. Your ankle joint doesn’t have enough range of motion to allow a deep squat with heels flat.
How to fix it: Elevate your heels slightly by placing a small weight plate or folded yoga mat under your heels. This temporarily compensates for limited ankle mobility and allows you to practice the squat pattern while you work on ankle mobility separately. For ankle mobility: daily calf stretching (30 seconds per side), and the ankle mobility drill — stand facing a wall, place your toes 3 inches from the wall, and try to touch your knee to the wall without lifting your heel. Work progressively closer to the wall over time.
Mistake 2: Knee Cave (Valgus Collapse)
What it looks like: As you descend or ascend, your knees drift inward toward each other rather than tracking over your toes.
Why it happens: Weak glute medius (the side-butt muscle responsible for hip external rotation), or poor motor patterning.
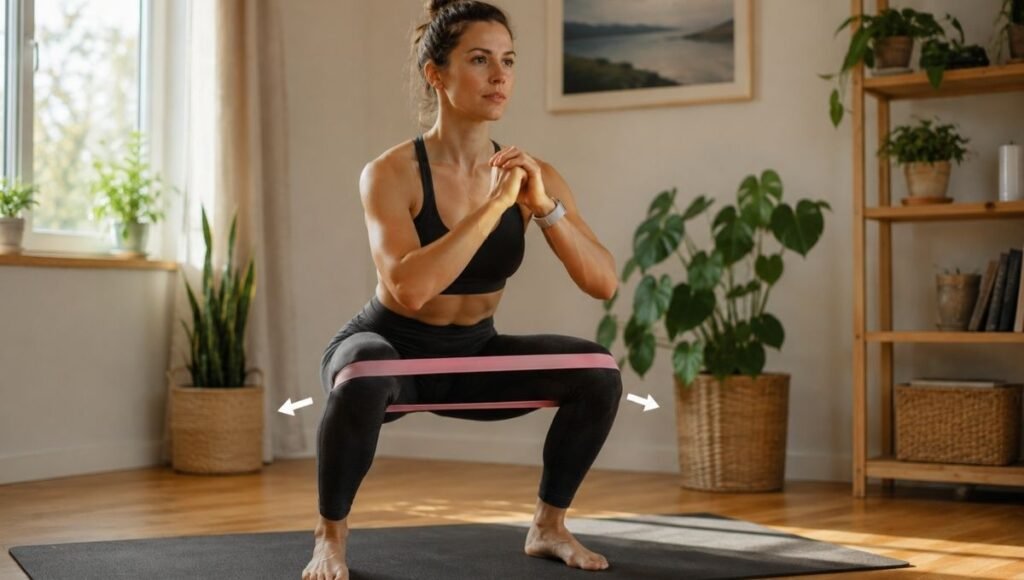
How to fix it: Place a resistance band just above your knees. The band will try to pull your knees inward — your job is to actively press outward against it. This cues the glute medius to activate and teaches the correct movement pattern. Banded squats are genuinely one of the most effective corrections for knee cave.
Mistake 3: Chest Falling Forward
What it looks like: As you descend, your torso tilts forward significantly — sometimes to the point where you’re almost in a “good morning” position at the bottom.
Why it happens: Tight hip flexors or hamstrings limiting depth, causing the upper body to compensate. Sometimes it’s simply a cue issue — the person is trying to lower their hips straight down rather than back and down.
How to fix it: Practice goblet squats (holding a weight at chest height). The counterbalance naturally keeps your chest upright. Also: think “keep your chest up” as a continuous cue throughout the descent.
Mistake 4: Not Reaching Parallel
What it looks like: The squat stops at a shallow depth — thighs barely dip below horizontal, sometimes only a quarter of the way down.
Why it happens: Usually a combination of habit, fear of knee pain (often unfounded), and limited mobility.
How to fix it: Box squats or chair squats. Use a chair as a depth target — lower until you touch the chair and stand back up. This teaches depth without requiring balance at the unfamiliar position. The chair also reduces the psychological “fear of falling” that sometimes causes premature stopping.
Mistake 5: Knees Traveling Far Over Toes
What it looks like: At the bottom of the squat, the knees are several inches past the toes.
Why it’s usually fine: “Knees over toes” became a fitness myth that caused enormous confusion. For most people in most squat contexts, some degree of forward knee travel is completely normal and not problematic. Where it becomes an issue is when the knees travel so far forward that the heel has to lift to compensate, or when there’s existing knee pathology.
The real cue: Your knee should track over your foot — specifically over your second or third toe. If it’s doing that and your heel is flat, you’re fine.
How to Improve Squat Form: The Practical Checklist
This is the question (KD=18) that most guides answer in a sentence or two. Here’s a complete, actionable answer.
Use this checklist every session until good form becomes automatic:
Before you start:
- [ ] Feet shoulder-width, slight outward turn
- [ ] Weight even across all four corners of each foot
- [ ] Core braced (not sucked in)
- [ ] Chest tall
On the way down:
- [ ] Knees tracking over second/third toe (not caving inward)
- [ ] Heels staying flat on the floor
- [ ] Hips moving back and down simultaneously
- [ ] Chest staying relatively upright
At the bottom:
- [ ] Thighs at or below parallel (if mobility allows)
- [ ] Heels still flat
- [ ] Chest not collapsed toward knees
On the way up:
- [ ] Driving through the whole foot, not just toes
- [ ] Hips and chest rising at the same rate
- [ ] Knees staying pushed outward
At the top:
- [ ] Fully extended at hips (no slight forward lean remaining)
- [ ] Glutes actively squeezed at lockout
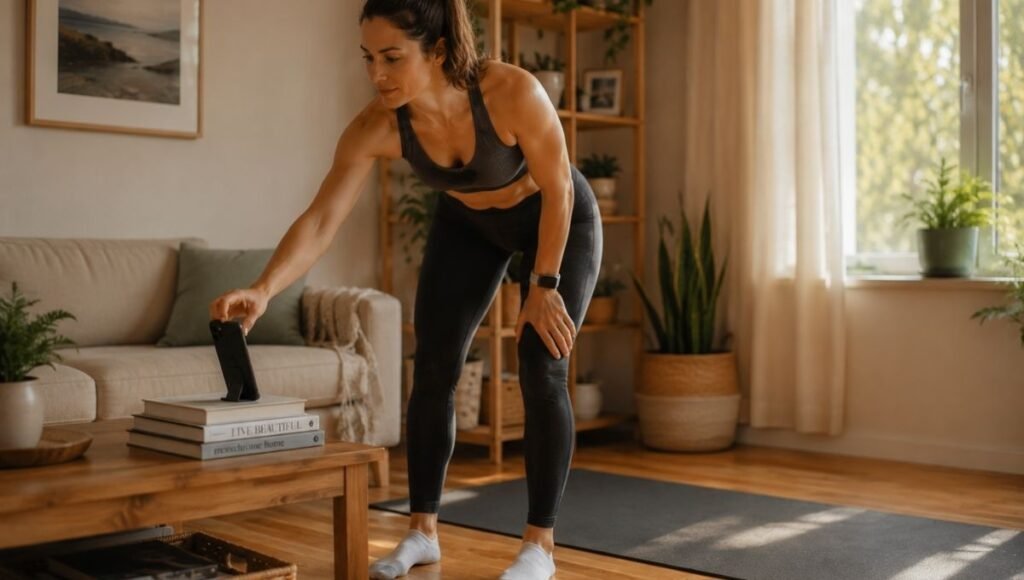
Filming yourself (the most underused form improvement tool): Set up your phone sideways at hip height and film a set from the side and front. Compare what you see to the checklist. Most people are surprised by the difference between what they feel they’re doing and what’s actually happening.
Squat Variations for Beginners: Your Progression Path
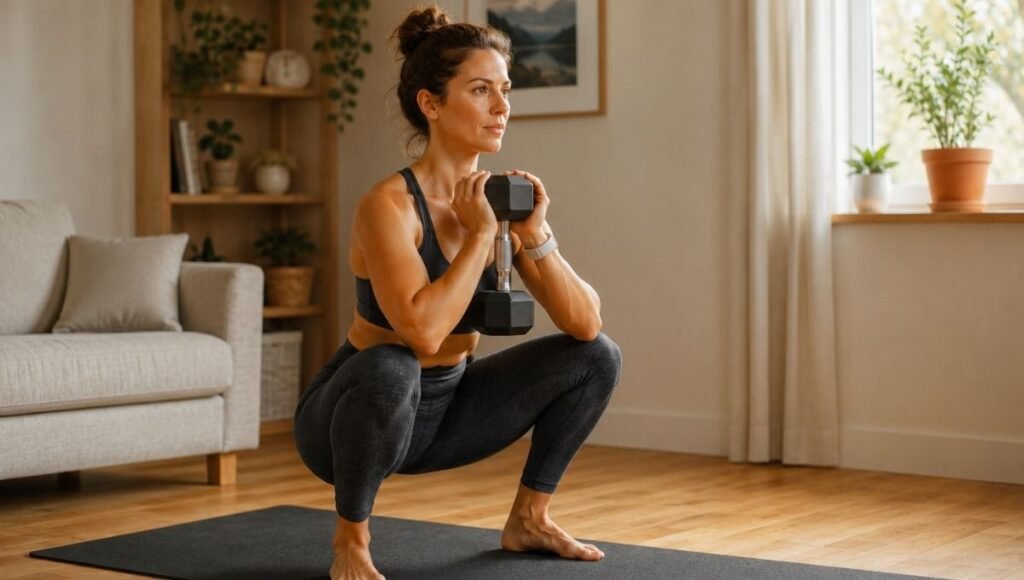
Stage 1 — Chair Squat (Week 1)
Stand in front of a sturdy chair, feet shoulder-width. Lower yourself until you just touch the chair seat, then stand back up without fully sitting. The chair provides a depth target and a safety net.
Why start here: teaches depth without requiring full mobility or balance confidence. The “tap and stand” removes the habit of dropping into the chair rather than controlling the descent.
Move to Stage 2 when: You can perform 3×15 chair squats with full control, no wobbling, and no bracing on the chair to stand up.
Stage 2 — Bodyweight Squat (Week 2–3)
Full range bodyweight squat with no chair. Focus on the form checklist above.
Progression within this stage: Add tempo — try 3-second descent, 1-second pause at bottom, 1-second ascent. This dramatically increases difficulty without adding weight.
Move to Stage 3 when: You can perform 3×15 full-depth bodyweight squats with good form, including the slow-tempo variation.
Stage 3 — Goblet Squat (Week 3–4)
Hold a single dumbbell or kettlebell at chest height with both hands. The counterbalance improves form naturally and adds meaningful resistance.
Start with a weight that challenges you for 10–12 reps. This is the beginning of progressive overload for your squat.
Progression: Increase weight by the smallest available increment every 2 weeks.
Stage 4 — Squat Variations to Add Variety
Once you’ve mastered the basic squat, these variations target slightly different aspects:
Sumo Squat: Feet wider than shoulder-width, toes out more. Greater inner thigh and glute activation. Excellent for women targeting glute development.
Bulgarian Split Squat: Rear foot on a chair, front foot forward. Single-leg squat variation that’s among the most effective lower body exercises available. Much harder than it looks.
Pause Squat: Pause 2–3 seconds at the bottom of every rep. Eliminates momentum and makes the concentric (rising) phase significantly harder. Same weight becomes much more difficult.
Your 4-Week Squat Workout Plan at Home
Equipment needed: A sturdy chair (weeks 1–2), dumbbells optional (weeks 3–4), resistance band optional but helpful throughout.
Week 1 — Learn the Pattern
3 sessions this week, minimum 1 day rest between sessions.
Each session:
- Chair Squat — 3 sets of 12 reps (focus entirely on form, not speed)
- Glute Bridge — 3 sets of 15 reps (warms up posterior chain)
- Calf Stretch — 30 seconds per leg (ankles need mobility work)
Week 2 — Remove the Chair
3 sessions.
Each session:
- Bodyweight Squat (normal tempo) — 3 sets of 12
- Slow Bodyweight Squat (3 seconds down) — 2 sets of 8
- Banded Squat (if you have a band) — 2 sets of 10
- Glute Bridge — 3 sets of 15
Week 3 — Add Resistance
3–4 sessions.
Each session:
- Goblet Squat — 3 sets of 10–12 (start with a weight that’s genuinely challenging)
- Slow Bodyweight Squat — 2 sets of 8
- Sumo Squat — 2 sets of 12
- Single-Leg Glute Bridge — 3 sets of 12 per side
Week 4 — Progressive Challenge
4 sessions.
Session A (twice this week):
- Goblet Squat — 4 sets of 10–12 (increase weight from week 3 if possible)
- Bulgarian Split Squat — 3 sets of 8 per leg
- Pause Squat (2-second hold) — 2 sets of 8
Session B (twice this week):
- Sumo Goblet Squat — 3 sets of 12
- Slow Bodyweight Squat — 3 sets of 10
- Jump Squat (optional, if low-impact isn’t a concern) — 3 sets of 8
The 10-Minute Squat Workout (For Busy Days)
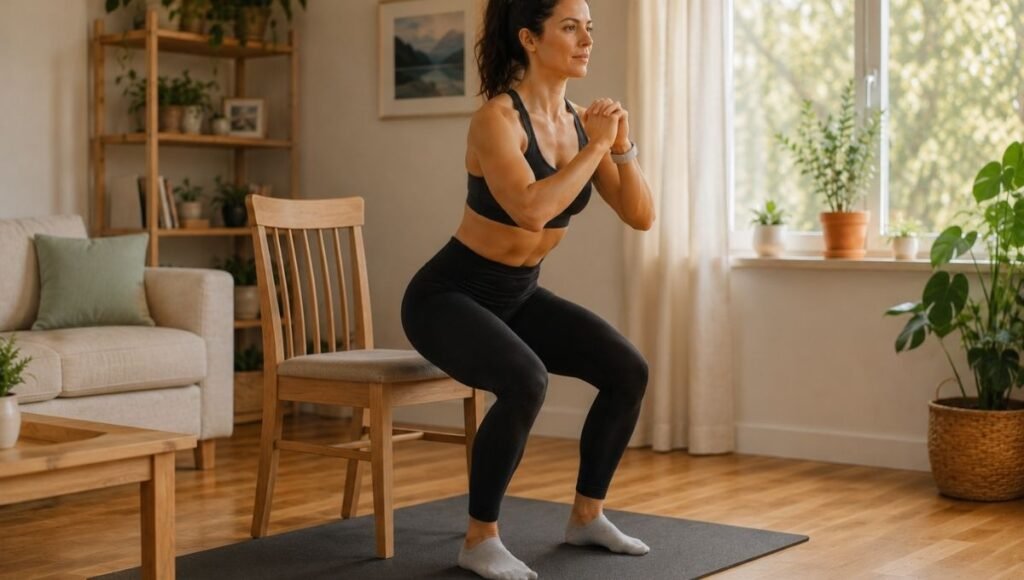
When time is short, this 10-minute circuit keeps the training stimulus alive:
- Chair Squat or Bodyweight Squat — 2 sets of 15
- Goblet Squat — 2 sets of 10
- Sumo Squat — 2 sets of 12
No warm-up needed if you start with the chair squat at slow pace for the first set.
Are Squats Safe If My Knees Hurt?
This is the most common concern beginners raise, and it deserves an honest answer.
For most people, knee pain during squats comes from one of three sources: poor form (knee cave, heel rise), inappropriate depth for current mobility, or pre-existing knee conditions that need professional assessment.
If you experience: Knee pain that’s sharp, localized to one spot, or that persists after the session — stop and see a physiotherapist before continuing squat training.
If you experience: General knee discomfort that improves as you warm up, or discomfort that correlates clearly with specific form problems — address the form problem first. Most “squat knee pain” resolves completely with corrected form.
Squat modifications for people with knee sensitivity:
- Reduce depth (parallel or slightly above)
- Elevate heels (reduces knee stress by reducing the forward knee travel)
- Chair squat until mobility and strength improve
- Add the resistance band above knees to correct knee cave
Do not force depth if it creates pain. Work toward depth gradually over weeks.
Frequently Asked Questions
How do I do squats correctly for beginners? Start with a chair squat to learn depth and control, then progress to bodyweight squats with the following form cues: feet shoulder-width with slight outward turn, core braced, knees tracking over toes, chest up, heels flat throughout. Lower until thighs reach parallel, then drive through the whole foot to stand, squeezing glutes at the top. Practice 3 sets of 12 reps per session, 3 sessions per week.
What are the most common squat mistakes? The five most common beginner squat mistakes are: heels rising (ankle mobility issue — elevate heels as a short-term fix), knee cave inward (glute weakness — use a resistance band above knees), chest falling forward (tight hips or hamstrings — practice goblet squats), insufficient depth (habit and mobility — use a chair as a depth guide), and not completing full hip extension at the top (stand fully upright and squeeze glutes at lockout).
How do I improve my squat form fast? Film yourself from the side and front. Most form problems are invisible to the squatter but obvious on video. Use the checklist in this article to identify your specific issue. Address one thing at a time — trying to fix everything simultaneously usually makes things worse. Add a slow 3-second descent to any squat variation to force better control and reveal form breakdowns.
Can I do squats every day? Bodyweight squats can be done daily without overtraining concerns for most people. Weighted squats need 48 hours of recovery between sessions — 3 times per week is optimal. If you want daily lower body training, alternate heavy squats with lighter squat variations or different lower body exercises.
Do squats make your thighs bigger or smaller? Squats build muscle and burn fat — the net effect on thigh size depends on your overall calorie balance. In a calorie deficit, squats help build or maintain muscle while fat is lost — most people experience their legs looking more defined rather than larger. Building significantly larger thighs from squats requires a calorie surplus and very heavy progressive overload over a long period — not something that happens accidentally.
Start Today
The squat is one of the most studied, most recommended, and most consistently beneficial exercises in all of fitness research. There’s a reason every strength training program — from beginner to advanced — is built around it.
You don’t need a gym. You don’t need a barbell. You need a chair, a living room floor, and the form checklist above. Do it three times this week. Come back next week and add some resistance.
For a complete strength training program that incorporates squats alongside other fundamental movements: → Full Body Dumbbell Workout at Home: The Complete Beginner’s 3-Day Plan
To understand how to keep making progress once the bodyweight squat feels easy: → What Is Progressive Overload? The Simple Rule That Makes Home Workouts Actually Work
For dumbbell exercises that complement your squat training: → Dumbbell Exercises for Beginners: 15 Moves, Every Muscle Group, No Bench Needed
References
- Schoenfeld, B.J. (2010). Squatting kinematics and kinetics and their application to exercise performance. Journal of Strength and Conditioning Research.
- Bloomquist, K., et al. (2013). Effect of range of motion in heavy load squatting on muscle and tendon adaptations. European Journal of Applied Physiology.
- American College of Sports Medicine (ACSM). Resistance Training for Health and Fitness. Position Stand, 2009.
- ACE Fitness. Muscles Worked During Squats. https://www.acefitness.org
- AARP. Squats: The Best Exercise You Can Do for Your Health. https://www.aarp.org/health/healthy-living/squats-best-exercise-for-strength/